Here is an update on a painting in progress, a gallery commission for a new restaurant being built in South Carolina.
Client to decorator to gallery to artist is the flow of communication, coordinating to work out the details on a project like this. The size for the painting couldn't be decided until more of the wall and window trim work had been installed, but we finally got the decision: it needed to be 55” x 55”. Being a custom size, I had to special order the canvas from a supplier in Houston, TX, who shipped it via freight. Sixteen days later, the canvas was uncrated and placed on my wall easel.
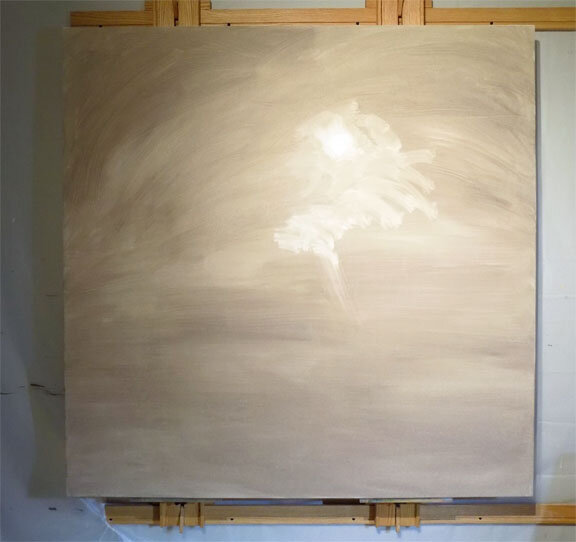
So what's next? How do I begin such a large painting? I am no longer intimidated by a giant-sized blank canvas, and I really love starting large paintings with large paintbrushes and big arm movements. I toned the canvas with my favorite underpainting color: thinned Raw Umber. An underpainting helps me establish some of the future values and gets rid of bright white canvas that might otherwise peek through later stages. While this was wet, I used a small rag to wipe out the lightest light: the sun and its surrounding area (first photo). I allowed it to dry two days. In this way, when drawing/placing the trees, I could wipe off to make changes without disturbing the underpainting.
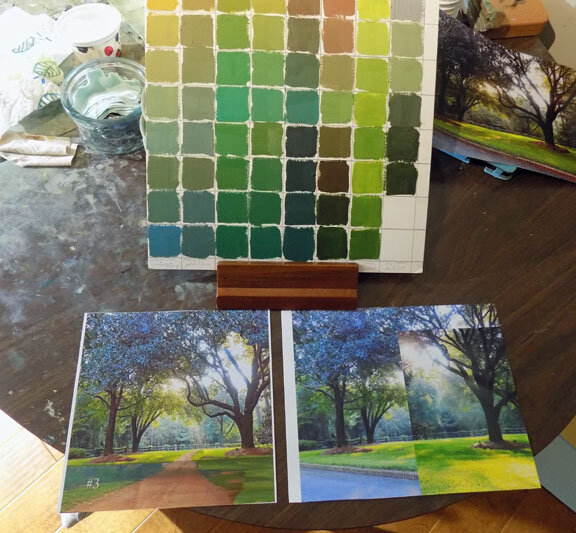
The second step was to examine my reference photos, which I'd already printed out. I got out my color chart of different recipes for green (second photo) and decided which main colors I was going to use: in this case, Phthalo Blue and Yellow Ochre will give me a range of greens from warm to cool. I will also use some Sap Green mixed with Raw Umber for the warmer dark greens and a little Cadmium Lemon Yellow mixed in for the lightest leaves and grass. Tints and shades made from Burnt Sienna mixtures will later create the red dirt road and hints of warm sunbeams streaming through the branches.
If you look at my reference photos, which are not that great, you will see they are heavily Photoshopped. I've added the road and flipped the tree on the right around to give it a better shape! I do stuff like this all time, taking great liberties with what was really there.
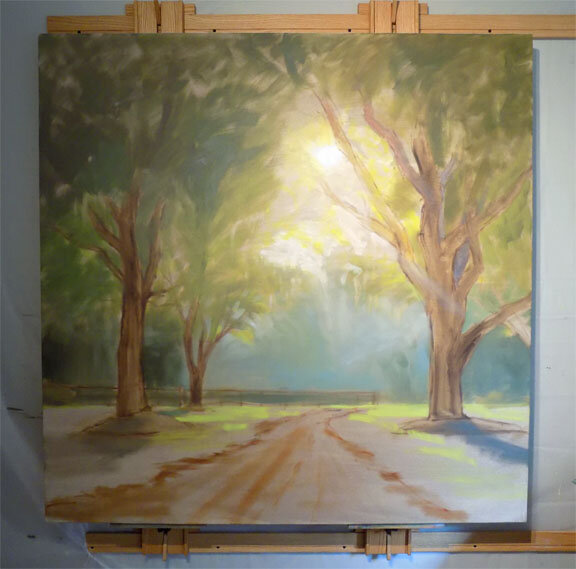
The next stage of the painting (third photo) was to “draw” the trees on the canvas with thinned paint. This was mentally tiring, but I enjoyed it. I don't use a projector or grid lines, I just hold up my photo to sight size to place the lines in approximately the right spot on the canvas. Trees have gestures and I took my time getting all the twists and angles drawn, though I left out some of the branches I thought were distracting. Then I drew, with paint, the horizon line, thinly blocked in the trees, a few shadows, and the tree canopy. I also used a straight edge to place fencing in the background. I laid out the road and finished by starting with the background color, one of my blue/ochre mixes. I love how it's looking already! I'll let this dry a few days before starting with the thicker paint.